
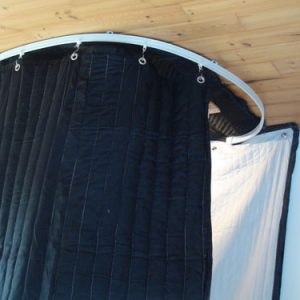
Use this Vocal Booth on Tracks (Ceiling Track Kit) with your acoustic blankets to create a walk-in vocal booth or studio without the use of floor space.
Excellent for existing space. Length 7 ft. Includes Brackets Rollers, S-Hooks and Screws.
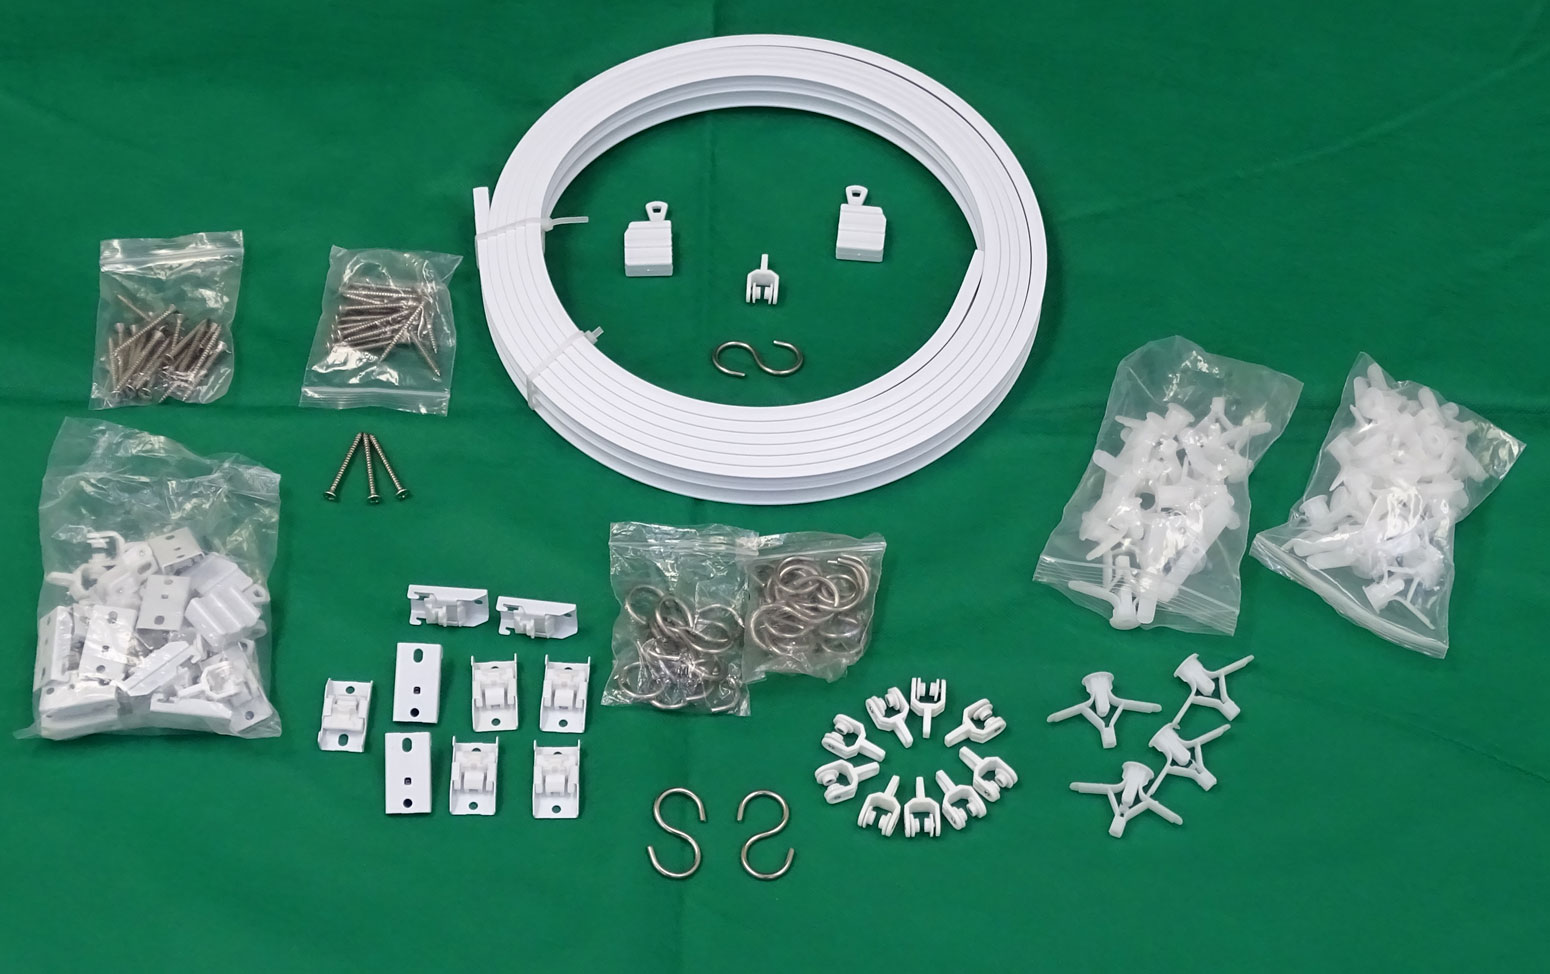
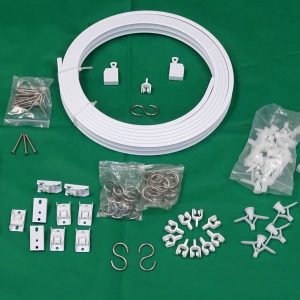
Ceiling Track Kit includes the following :
1) Flexible tracks – Basic Kit includes 7 ft long track. If you ordered more than 2 sets of tracks at the same time, we will send you one continuous track , which is 7 ft times number of sets. (Tracks can be easily cut with sheet metal cutters or metal cutting saw).
2) 2 End caps. Two end caps come with each 7 ft length of track.
3) 10 Rollers. Ten rollers included per every 7 ft of track.
4) 10 S-hooks. Ten “S”-Hooks come with every 7 ft of tracks.
5) 9 Ceiling Brackets. Nine Ceiling Brackets per every 7 foot of tracks.
6) 20 Screws with Anchors. Two per each Ceiling Brackets and 2 Spare.
Ceiling Track Kit Assembly instructions
Ceiling tracks come with special ceiling brackets to attach the tracks to the ceiling.
1) First plan how your track is going to run on the ceiling. Is it straight line or curved?
2) Mark location of the brackets, approximately every 10-11 inches. Ideally you want some of the screws to go into a beam or a stud for better support.
3) Mark location of the screws for the brackets. If you plan to run the tracks in a curved line make sure that the Ceiling brackets lay at 90 degrees angle to the tracks
4) Install anchors. Drill the holes for the Anchors. (Use a 5/16″ drill bit.) Insert plastic anchors
5) Install the ceiling brackets.
6) Attach the tracks to the Brackets. This is a snap-on installation. Plastic part on the bracket is movable. To install the track simply hook one side of the track at the bracket metal lip and then gently press on the other side. The plastic locking part will move away and then lock the tracks in place.
7) Slide in the rollers. Fit the end cups at the end of the tracks. Insert the S- Hooks. TIP: you can assemble the Tracks with End cups and Rollers before fitting the tracks into the Ceiling brackets.
8) Insert the S-hooks and hang the blankets.
TIP: When creating a Vocal booth on tracks plan on having the blanket hanging loose, with some pleats, not taut. This will increase the sound absorption efficiency of blankets.
__________________________
Warning: Ceiling Track Kit contains small parts that might be a choking hazard. Keep out of reach of children.
Reviews
There are no reviews yet.